Friday, November 21, 2014
How to Get Samsung’s LG’s Best Exclusive Features on Any Android Phone

LG’s QSlide feature lets you put one or two small windows on top of your work running the browser, video player or calculator apps. Samsung’s Pop up play is the ability to watch video at the same time as you text, email, browse the web or do just about anything else on your phone.Alternative Apps: There are a lot of third-party floating apps in Android Market that will put windows on top of your work even though it is not as attractive as QSlide or Pop-up Play. Floating Browser Flux is a resizable browser in a window that has tabs and can be activated from the notification drawer. Super Video, Floating & Popup plays local video files in a window and support re-size, move window, two multi-windows play-back, while Floating YouTube plays streaming videos.Floating Mail and Floating Chat promise the ability to put email or IMs on top of your work, but neither app was able to connect to our accounts. AirCalc provides a floating calculator, complete with a see-through Lcd. Unfortunately, none of these floating apps allow you to adjust transparency like the LG and Samsung solutions do.
It is really annoying when you’re reading something intently on your phone and suddenly the Lcd turns black and goes to sleep because you haven’t tapped the glass in a while? Samsung’s Smart Stay feature uses your phone’s webcam to determine that you’re still staring at the Lcd and reset its timeout.Alternative: The app called SmartStay Ex provides the same functionality, with more options than Samsung offers. SmartStay Ex keeps your Lcd from turning off while you are using it by scans the front camera for faces at regular intervals. If a face is found, it will keep the Lcd from turning off. There are many advanced options available and many more planned!Samsung Motion Gesture Alternatives
Samsung provides an easy way to deny an incoming call by just flipping the phone over to silence it. Other Samsung motions include Direct Call, which starts dialing the phone number of a contact as soon as you lift the phone to your ear.
One of the more attractive features of HTC’s Sense UI is its optional People Widget, which displays social updates from your friends right on your device. There are several free alternatives in the Google Play Market.
Both LG and Samsung provide the ability to take Lcdshots, draw on them with your stylus or finger and share them. LG’s QuickMemo stands out, because it lets you scribble a note on top of the Lcd (example: “Buy milk”) and keep them there even as you continue to use your desktop and apps below.
Even the largest phones only provide between 5 and 6 inches of Lcd for watching HD movies. So what if you want to get a closer look at the skier slaloming down the middle of the display rather than seeing the whole mountain? LG’s Live Zoom feature lets you pinch-to-zoom in on offline videos just like you can for Web pages and photos.
LG’s QTranslator app can convert foreign language writing to English (or your native tongue) in real- time via the device’s camera. More advanced than Google Translate.
Motorola Mobility may not get any love from Google, but we’ve always been fond of the Smart Actions phone automation app Moto puts on its RAZR phones. Using Smart Actions, we’ve been able to configure our phone to automatically go into silent mode when we’re in a meeting or stop syncing data at night when we want to save data.
Thursday, November 20, 2014
How to Install Android v4 4 4 KitKat CandyKat Custom ROM on Google Nexus 5 full Tutorial
- Although installing custom ROM improves the devices overall performance and UI activities, it makes the business warranty void and they will no longer be prone to provide updates in future (Users could restore warranty by flashing the product with stock-ROM).
- This Android v4. 4. 4 KitKat CandyKat personalized ROM has to be fitted just on Google-LG Nexus 5 Style (To check your model: Go to Settings >> About phone >> model number)
- You must rooted the phone first.
- For Installing of custom ROM needs to clear of whole data within your smartphone, So ensure that you back up your all the data by the help of Clockwork Mod. [CWM] Recovery/ TWRP in the smartphone.
- Now youve to make sure that your USB drivers is installed in the PC, or else the phone (Google-LG Nexus 5 model) wont recognize by your Personal Computer, Laptop or Whatever you use.
- The very last step is to make sure your device has little more than 80 percent battery power, or else there exists chances of getting bricked just for temporarily not to worry thats because if the installation process interrupt.
The most beneficial Twelve(12) I mention here :
- Completely new hardware switch settings.
- Candy sweetener themes and mods
- Google ID dialer
- Dark themed UI
- Slim Pie
- Custom carrier label
- Custom candy images
- New battery icons
- New LockScreen themes
- Hover feature
- Custom toast animations
- Performance tweaks and many more improvements to enhance user-experience
[Disclaimer: This process is very technical and a person who is actually good with rooting have to perform this sound familiarity [or manual software installation] in all the Android devices.
Be Aware!! If the installation process is not followed step by step properly, there will be more chances of the smartphone getting bricked.
You can find in International Business Times, India Edition wont take any responsibility for almost any claims or damage if the procedure does not yield the satisfied results or in the event that smartphones get bricked. (Hence users advised to proceed with caution.)
Step-by-step ROM Google-LG Nexus 5 set up procedure of Android v4. 4. 4 KitKat CandyKat:
Step 1: Android v4. 4. 4 KitKat CandyKat Custom made ROM Download (HERE) also with Google Apps (HERE) in the PC.
Step 2: Connect Google LG Nexus 5 in order to PC via UNIVERSAL SERIAL BUS (USB) cord.
[Note: Before plugging the device to the laptop or computer, make sure you might have installed USB drivers software, if not necessarily, click Here in order to download the firmware]
Step 3: After that, place Android v4. 4. 4 KitKat Custom ROM zip file as well as the Google Apps. zip file to the phones SD card memory. [Note: We Advised users to paste the. zip files inside SD card root menu, not in any other folder]
[Note: Before Users start installing the actual software, Do make sure the device is already rooted and ClockworkMod Recovery is installed perfectly]
Step 4: Now turn-off your cell and disconnect it from the PC.
Step 5: Now perform the standard [Boot-loader] Mode sortie, by means of pressing volume up and volume down and power buttons at the same time.
Step 6: The moment performing the (Bootloader mode) go to ClockworkMod Recovery mode then perform whole data wipe, by choosing wipe data/factory reset [Note: Use volume keys to navigate along with power button to pick options, while working is under Recovery Mode].
Step 7: Then, Youve to clear the cache memory by selecting "wipe cache partition."
Step 8: When you are performing the (Bootloader mode) go back to ClockworkMod Recovery mode then perform whole data wipe, by choosing wipe data/factory reset [Note: Use volume keys to navigate along with power button to pick options, while working is under Recovery Mode]
Step 9: Then, come back to the main recovery screen and then tap on install zip from SD card.
Step 10: Next tap choose zip from sd-card and go to Android 4. 4. 4 ROM zip file in Sd card and enter the actual installation process. Do the same procedure for installing Google Apps. [Note: Use volume tips to navigate and also power button to pick out options].
Step 11: Once carried out with the installation method, navigate to +++++Go Back+++++ and re-start your phone by opting "reboot system now".
Now, your phone "Google-LG Nexus 5" will take at least five minutes to finish the booting method.
Users, then head to Settings >> select About phone to confirm the installation of Android v4. 4. 4 KitKat CandyKat Custom ROM.
Wednesday, November 19, 2014
HTC One X How To Change Font Without Root
Display is one of the important role that must exist on the operating system and therefore the author will try to share about how to change the font andoid course that we do not feel bored when using the gadgets that we have and can change the look according to our desires , how to change the font HTC One X have several ways but here Ill share that in the type for HTC One X according to the author is doing .
sometimes to make changes to the appearance of the android system we have to ROOT the phone while if the phone is already in the root then the warranty will be forfeited , if unfortunately it still has a warranty but already in the root and therefore the author will give solusion .
the following steps:
first
Please download the font used on the link below Android Changing the font
then simply extract the rar file and input into your mobile phone and do the installation .
So easy is not the way to change the font in android hopefully useful if you are not clear please do comment on the post below thanks .
Tuesday, November 18, 2014
HTC One X How To Changing Application At Bottom Dock
However , did you know that 3 applications at the "bottom dock " ie " Phone " , " Messaging " , " Contacts " can be replaced with other applications
Settings to customize the shortcut on the "bottom dock " clearly does not look like the way the other settings on the homeLcd , but HOCSmile found that the application of the "bottom dock " This can be customized . The following are the steps for replacing Bottom Dock HTC One X apps :
1 . Open the " app drawer " by clicking the icon on the "bottom dock" .
2 . Click the button that will display the options menu " Edit" .
3 . Click the " Edit " .
4 . Select an application in the " app drawer " , Press and hold until it vibrates , then drag the application to the "bottom dock" .
Bottom Dock HTC One X Preview
Bottom dock can only accommodate a maximum of 4 icon . So in this way , you can only replace 3 existing applications with bottom dock application of your choice . Applications you selected will disappear from the app drawer and move to the bottom dock , while the application of the bottom dock will move on to the app drawer . While the button to open the " app drawer " or return to " Home " can not be replaced . Good luck !
Samsung Galaxy S3 Mini Value Edition GT I8200L How to Install I8200LUBUANB2 Android 4 2 2 Jelly Bean Firmware
- Download Android 4.2.2 UBUANB2 Firmware for Galaxy S3 Mini I8200L from the above list
- Download Odin 3.09
- Switch off your phone and boot Galaxy S3 Mini I8200L into Download Mode by pressing and holding the Volume Down+Home+Power buttons (long press until the boot Lcd appear), now press Volume Up key to proceed to Download Mode.
- Extract the downloaded Odin3.09 zip file and run the Odin3 v3.09.exe file as an administrator (Right click on the .exe file and click on Run as administrator)
- Now connect your Galaxy S3 Mini I8200L to your computer via USB cable
- In Odin3 Lcd, you should see a COM Port number like “0:[COM7]” at ID:COM section and “Added!” text at the message box. This means your device has been detected by Odin3.
- Make sure that, only the “Auto Reboot” and “F. Reset Time” options are checked.
- Now, extract the downloaded firmware zip file, you’ll find a firmware file with extension .tar.md5
- In Odin Lcd, click on AP button and select the firmware file with .tar.md5 extension (The firmware file look something like: I8200LXXDLJ5_I8200LODDDLI7_INU.tar.md5)
- Now, click on the Start button to begin the installation process, wait few moments.
- Once completed, you would see “PASS!” message in ID:COM port having green background
- Your phone should automatically reboot after completion
- You can now disconnect your phone from computer
HTC One X How To Change Device Name
The steps :
1 . Dd you must must must already mandatory in the state of ROOT .
2 . Root explorer .
3 . Open root explorer , then looking at the system / build.prop .
4 . Copy the build.prop to your sdcard .
5 . Click the resistance that has been copied build.prop there NTAR open in a text editor .
6 . Then find the line ro.build.version.release = 2.3.4 then you can switch into that os version you want. Want to 7.7.7 or 4.2 is up to you ;)
7 . Find line ro.product.model = samsung ace then you can replace with Esia , SGS3 , tab2.7 or what ever do you want :)
8 . Wipe option button , save the change .
9 . Exit .
10 . Copas build.prop edit that you ve had to the system again .
11 . Sett his permission .
12 . Reboot ( DWYOR )
Taraaaaaaaaaa ~ in About phone OS version and device name was already in accordance with your wishes :)
NOTE : OS VERSION HERE DOES NOT MEAN YOU IN UPGRADE YA HH . CURRENCY MANIPULATION IS JUST ONLY
: P tuker OF SUCH YOU BECOME 4.0.1 ICS 2.3.6 GB . DOES NOT MEAN YOU ARE ICS OS : P
Monday, November 17, 2014
Nokia 7230 Device Not Detected on USB to PC connection

Monday, November 3, 2014
How to Troubleshoot a Garmin nuvi 1100 1200 1300 or 1400 Series GPS
The Garmin nuvi 1100, 1200, 1300 and 1400 series of GPS devices make it easy to get from Point A to Point B -- when theyre working. When theyre not working, they can be the biggest obstacle in getting where you need to go. Use troubleshooting to work your way through a wide array of problems with your device so you can get back on the right track.
Garmin nuvi Doesnt Get a Signal
Your Garmin nuvi GPS can fail to pick up a satellite signal if youre currently inside of a metal building, a building with very thick walls or heavy insulation, or if youre surrounded by a lot of very tall buildings or trees. If your Garmin nuvi GPS loses a satellite signal, park your vehicle in an area away from these obstacles and wait for your device to pick up a signal, which may take a few minutes. If you still havent picked up a satellite signal on your device after a few minutes, restart your Garmin nuvi GPS while still stationary to see if that helps.
nuvi Doesnt Charge in Car
- The fuse in the power adapter that plugs in to a vehicles cigarette lighter may need to be replaced. You can replace the fuse by doing the following:
- Remove the fuse by removing the screw on the far end of the power adapter that plugs in to the cigarette lighter.
- Carefully tilt the part of the power adapter you removed the screw from into a cupped hand. A small silver tip piece and a small fuse will fall out. The fuse is a glass cylinder. The fuse number is located on the side of the power adapter.
- Insert a new replacement fuse in the power adapter and then slide the silver tip in behind it.
- Replace the screw on the end of the power adapter.
- Plug the device in and see if the Garmin nuvi GPS charges.
- Make sure your key is in a position in the ignition where the vehicles battery is turned on. If the battery isnt on, the Garmin nuvi GPS wont be able to charge.
- Make sure the temperature inside of the car is between 32 and 113 degrees Fahrenheit. The Garmin nuvi GPS cant charge in conditions that are too hot or too cold. Also, make sure the sun is not shining directly on the devices screen; this can also prevent your device from charging.
Computer Doesnt Detect Garmin nuvi GPS
If your Garmin nuvi GPS is turned on when you connect it to your computer, your computer may not recognize the device. Power down your Garmin nuvi GPS and then connect it to your computer. The computer will automatically detect the Garmin nuvi GPS and the device will boot up in USB Mass Storage mode. You can check that your computer is in USB Mass Storage mode by opening Windows Explorer. Your Garmin nuvi GPS will appear in the Devices With Removable Storage section. If after doing this your computer still doesnt recognize your Garmin nuvi GPS, try some of the tips outlined in the following article:How to Troubleshoot Windows 7 USB Problems. The article focuses on Windows 7, but similar approaches also work to troubleshoot issues with Windows Vista and Windows XP USB ports.
Garmin nuvi GPS Doesnt Respond to Touch
Restart your device. If that doesnt work, try recalibrating it. You can recalibrate your Garmin nuvi GPS by doing the following:
- Power down your Garmin nuvi GPS.
- Press and hold your finger against the upper-left corner of your Garmin nuvi GPS touchscreen. Press the "Power" button to turn on your device and continue holding the Power button down as the device boots up until the Garmin screen appears and then release the Power button.
- Continue pressing your other finger against the upper-left corner of the Garmin nuvi GPS touchscreen until a white dot appears in the center of your devices touchscreen that says "Press dot."
- Remove your finger from the upper-left corner of the screen.
- Press as close to the center of the dot with the finger you use most to touch commands on the touchscreen to calibrate the device. The device will continue booting up and the touchscreen should be responsive when you touch commands.
Phone Wont Connect to Garmin nuvi GPS
Your Garmin nuvi GPS may not have a Bluetooth option. Touch "Tools" on your Garmin nuvi GPS home screen and then touch "Settings." If you have a Bluetooth option, your device has Bluetooth. If you have a Bluetooth option, tap it and then tap to enable Bluetooth. Also, make sure your phone is within 35 feet of the Garmin nuvi GPS, as your phone wont work outside of this range.
How Do I Quickly Delete My Personal Data?
You can quickly remove all of your personal data, such as your favorites and destinations, from the Garmin nuvi GPS by pressing a finger against the lower-right corner of your devices home screen while the device is powering up. A dialog box appears asking if you want to clear all of your user data. Press "Yes." The amount of time it takes to complete the process depends on how much personal data is on the Garmin nuvi GPS. After your personal data is removed from the Garmin nuvi GPS, the device will boot up normally. Doing this restores the devices original settings and removes any information youve saved to the device, such as destinations and favorites.
nuvi Doesnt Stick to Windshield
- Clean the part of the windshield where youre trying to stick the Garmin nuvi GPS with soap and water to remove any dirt from the area.
- Rub rubbing alcohol on the part of the windshield where you want to stick the Garmin nuvi GPS and then wipe it off using a soft silk cloth.
- Rub rubbing alcohol on the bottom of the suction cup that attaches to the back of the Garmin nuvi GPS and then wipe it off using a soft silk cloth.
- Place the suction cup against where you want to stick it on your windshield and then press the suction cup against the windshield.
Thursday, October 30, 2014
Nokia 7510s Unable to charge repair solution

make a continuity check on the fuse by using a multimeter, replace it if found damaged.
Check the chip diode if shorted or not, a shorted diode will make the fuse blown out again.
If the chip fuse and chip fuse is working fine and found out that theres no problem on both it, you may proceed to work on the betty IC,
The betty IC holds and control the charging operation of the cell phone battery.
Re-flow and apply a mild heat first on the betty IC, then check again if the problem was solved.
If the problem still exists, remove the betty IC, trace the corresponding solder ball bumps that is connected to the filter coil (power inductor). If found cut or open and you can manage to apply a jumper wire, then do it, if wont not just leave it and return it to the owner..
If the said line paths is okay you may re-ball the betty IC then in-place and mount it back again.
If the problem still persists, you may then find a new replacement spare betty IC and replace it.
Wednesday, October 29, 2014
How to Soft Reset HTC Dream
How to Soft Reset HTC Dream
A soft reset htc dream clears the device memory and closes running applications. Perform a soft reset when your device hangs or freezes, is running slower than normal, or an application is not performing properly. If a soft reset is performed when applications are running, unsaved information will be lost.To perform a soft reset
1. Remove the back cover.
2. Remove the battery for a few seconds.
3. Re-install the battery, replace the back cover, then turn on the device
To remove the back cover
1. Make sure the device is turned off.
2. Hold the device sideways with the control buttons on the right.
3. Slide the screen panel up to reveal the keyboard and the back cover release tab.
4. Gently push down the release tab with your finger until the back cover disengages from the device.
5. Pull the back cover out then set it aside.
How to Nokia Master Reset or Hard Reset a Nokia N96
Nokia N96 Hard Reset, Nokia N96 Master Reset Nokia N96 reset
To perform a master reset or hard reset on your Nokia N96 you will need to:
dial *#7780# or *#7370#
enter your security code (default is 12345)
How to Hard Reset LG GW620 Eve
LG GW620 [Eve] Hard Reset
To do a hard reset or data reset in LG GW620 aka EVEEnter using Dial pad
3845#*620#
From menu select factory reset or whatever you want.
Monday, October 27, 2014
Nokia 1800 and Nokia 1616 Solution to fix Charger Not Supported on

Saturday, October 25, 2014
How to Install the ClockworkMod Recovery for the Galaxy Tab P1000

The upgrading make your device to faster on operating system this thing make us want a custom ROMs, and when we want to take a custom ROMs in our devices, we cannot flashing them without a custom recovery installed in our tablet. ClockworkMod Recovery is a powerful possibility to make this thing. Via Technomancer’s kernel can be installed an easy modality to flash custom recovery on your Samsung Galaxy Tab.
Note: Your tablet should and must be running on stock Android 2.3 Gingerbread before you can go on with the process.
- This guide will be applied only if your device is Samsung Galaxy Tab, model number GT-P1000. If you’ll, applying on another model you can produce undesired consequences.
- Use all information from this guide for instructional and educational purpose only.
- There is no guarantee that these instructions will work under your particular and unique circumstances.
- Use all this instruction only at your own risk, Is not our responsibility or liability for whatever happens to you or with your device if you’ll apply this instruction on it.
This guide shows you:
How to flash ClockworkMod Recovery for the Galaxy Tab P1000.
- Samsung Galaxy Tab GT-P1000 device which running on stock Android 2.3 Gingerbread
- A personal PC with Windows Operating System
- Your original USB cable for your tablet
- A software/program that can extract TAR archive files(7-Zip, WinRAR)
- Extract the archive Heimdall Suite 1.3.2 in the folder named Heimdall Suite.(drivers and the Heimdall Suite application)
- Now connect your original USB cable to the PC.( don’t connect yet the tablet device)
- Switch off your tablet.
- For this step reboot the tablet into Download Mode. For this operation should press and hold in the same time the power button and volume Down button as you connect the other end of the USB cable to your tablet.
- Go on your Windows PC and double-click the zadig.exe File located on the Heimdall Suite folder; this Application allows you to install the USB drivers in an easy way, drivers needed for Heimdall to establishing a connection with your tablet device.
- Now going to select Option and now choose from the menu: List All Devices.
- Now you will see a drop down list, and in this drop down list select either Samsung USB Composite Device or Gadget Serial, and now choose Install Driver. Heimdall can now use your computer safely.
- Note: If a prompt appear with the “that the installer is unable to verify the publisher of the driver” message, select “Install this driver anyway.”
- After the driver installation is done, unplug your tablet device from the USB cable.
- Power off your tablet device.
- Reboot the device into Download Mode like as in step 4 described above.
- Now going to Untar Technomancer’s Kernel. To obtain zImage file. Copy this zImage file into the Heimdall Suite folder. The zImage file should be inside in the same location/folder with heimdall.exe File.
- For this step you should open a command prompt on your PC. Now you should change directory to where heimdall.exe it is.
- In command prompt enter the following line command:
Thursday, October 23, 2014
How to backup and Restore your SMS on Android Phones

Features for SMS Backup & Restore:
- You can now backup your SMS Messages in one easily mod and a universal extension, XML format.
- It’s easy to choose a scheduled time to make automatically your backup for SMS in your phone everyday.
- For be an individual backup every time when you want, now you can choose the name of the file to backup to.
- Have a great Option to add and XSL style sheet to the XML file, this thing make it this file to be open easily with a browser web like Firefox or Internet Explorer.
- The Backup format not depends of which Android versions you use so the messages can be portable easily from one phone to another, Tested with v1.5 to v4.0.
- An option which permit to select the individual conversations to backup.
- Choose the format for the auto-generated file name.
- Function for Restore SMS Messages with a great option to select the backup file to be restored from the folder.
- View Messages in the backup files.
- Possibility to delete all SMS Messages on your Android Phone.
- Email a backup file.
- Option to delete existing backup files plus an option to delete old files automatically, after specified number of days.
- Import SMS messages from Windows Mobile, from Nokia and from Sony Ericsson.
- You can view and edit on your computer using MS excel the backup files imported from your android.(click here to see how) .
How to Backup SMS on Android.
- First go to access the Market icon on your Android device.
- On the search box of Market store application type SMS Backup and Restore, and then press on search button.
- When the results appear press “SMS Backup & Restore”, and install it.
- Now wait to finishing the installation of program and tap the “SMS Backup& Restore” icon on your Android phone to run it..
- Now a GUI interface will be displayed and go to press “Backup SMS Messages” Button.
- Enter file name and press on “OK” button.
- The application will start SMS Backup immediately the process on your android device.
- Press the “Close” button when SMS Backup is completed.
How to Restore SMS on Android with SMS Backup & Restore application
- First transfer the SMS backup file on your SD Card on your Android phone.
- Run the SMS Backup & Restore application and after the GUI application is displayed press Restore SMS Messages button.
- Chose a SMS backup file that want to restore and after press on Ok button.
- The application will start restoring the SMS messages on Android.
- After the restoring process is finished press “Close” button.
Friday, October 17, 2014
How to Hard Reset Sony Xperia Z2
 We have our own reasons why we hard reset our device. Maybe we want to delete all the files and restore the device to its original state. It could also be the device may be malfunctioning or so slow and it needs to be reset.
Restoring the default settings or factory reset your Sony Xperia Z2 will delete all your existing files. It is recommended to backup your important files on your computer before attempting to reset your device.
Use this method if your device is frozen or unable to solve by Factory Reset.
Hard Reset:
Tuesday, October 14, 2014
How to Update Samsung Infuse 4G i997 to Jelly Bean 4 1 via Cyanogenmod 10
Disclaimer : The Procedure described in this article are risky & can cause damage to your device. You should not try to attempt this if you are not aware of these things. Please follow this guide completely at your own risk. If any damage happened to your device while following this tutorial, neither we nor developer should be held responsible for the same.
Please note that, this update of Cyanogenmod 10 is applicable only for Samsung Infuse 4G bearing model number I997. DON’T try it on any other device, it may cause damage to your phone..
Pre-Requisites before installing Cyanogenmod 10 :
Charge your device upto 60% battery level so that installation procedure won’t be interrupted.
You will have to wipe all the data (excluding SD card) before installing this custom ROM update. Therefore it is highly recommended to Backup all your data from phone memory which includes contacts, messages (SMS/MMS), call logs, Internet APNs etc.
Enable USB Debugging option in your phone which can be found out here : “Settings->Applications->Development->USB Debugging”
Procedure to Update AT&T Samsung Infuse 4G I997 with Cyanogenmod 10 :
Before proceeding to the actual installation procedure, ensure that your device is running Android 4.0 (ICS) ROM & has custom recovery installed in it. Please don’t proceed further if your phone doesn’t meet above 2 requirements.
Download latest Cyanogenmod 10 package from the official development page (link is mentioned below) :
Infuse 4G Cyanogenmod 10
(Optional) Download Google Add-on Apps (Gmail, Maps, GTalk, Play Store etc.) which need to be flashed manually since they are not present in the ROM by default.
Google Apps (Jelly Bean).
After downloading CM10 & Google Apps, connect your device to PC. Enable mass storage mode on it. Now copy Cboth the files to your device’s SD card.
Disconnect it from computer. Boot in recovery mode on your phone. To do so, switch off the phone completely. Press & hold Volume Up + Volume Down + Power Key together until recovery mode appears (you may release power button after Samsung logo but keep holding other two).
Take a nandroid backup of your current ROM so that it can be restored back (in case if anything goes wrong). To backup your current ROM, select Backup and Restore option from the recovery mode & on next Lcd, select backup. Now It will make a nandroid backup of your whole system (excluding SD card). Wait for the backup process to get finished.
Select wipe data/factory reset & wipe cache partition to wipe all the data & caches from the phone memory respectively.
Now Select “install zip from sdcard” followed by “choose zip from sdcard“. Navigate the ROM file (which you’ve transferred earlier) Select it & press on ‘Yes‘ to continue. ROM installation process will start.
Wait for the ROM to get installed. After ROM gets successfully installed, your phone will land in the recovery mode again.
(Optional) The same procedure you have to do for installation of Google Apps (Don’t wipe the data again). After you finished installation of Gapps, press back button to go to main menu of CWM.
Select reboot system now from the recovery mode to Restart the phone.
Congratulations !! You’ve successfully updated your Samsung Infuse 4G with the Jelly Bean based custom ROM (Cyanogenmod 10). Keep visiting the official development page for the latest updates & if you have any issue regarding this procedure, comment it below, we will try our best to sort out the same.
Tip: In case if you want to revert back to your previous ROM , enter into recovery mode (mentioned above), from the main menu, select Backup and Restore option & on next Lcd, select restore & choose your latest backup to restore.
Wednesday, October 1, 2014
How to transfer Contacts SMS Photos Files from Android Phone to Sony Xperia Mobile
And here we are going to show you a simple way to transfer your all important data from your Android or iOS device to Sony Xperia Smartphones:
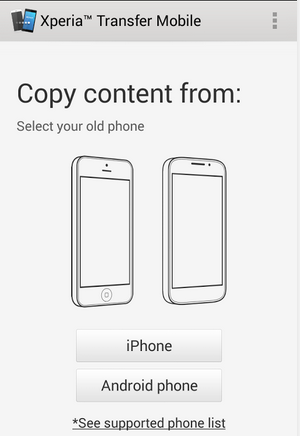
You have to install a free APP called Xperia Transfer Mobile on both your devices the new Xperia Smartphone and also the OLD phone from which you want to transfer the data (Play Store Link)
With this app you can transfer Contacts, Calendar, SMS, MMS, Bookmarks, Notes, Photos, Music, Videos and Apps (only from iPhone)
After installing the app on both devices you have to Pair the devices together either by entering the PIN and in case you have NFC you can tap both the devices together to initiate the transfer process.
Select the Old Device – iPhone or Android phone

In case of Apple iPhone you have to connect your devices with the wire provided by Sony in the Xperia box or you can even choose to transfer it through WiFi like in android devices.
In case of Android devices WiFi Direct needs to be activated to start the transfer
Note: Data which is present on your device will be transferred and the data synced with online services will not be transferred with this App.
Devices Supported:
Old Phone: Android 4.0 and later, iOS 4.0 and later
New Phone: Android Jelly Bean 4.3 and later
Make sure that you recheck that all your important data is transferred properly to your new Xperia Smartphone before deleting the data from your old phone as sometimes some data will not be transferred due to certain restrictions and errors.
In case you want to transfer any data between any phone and your Xperia device you can use this app to transfer stuff like Videos, Music etc faster than through Bluetooth, but the only problem is that you cannot select any photos or videos separately and all the photos and videos will be sent.
Wednesday, September 24, 2014
Hard Reset Garmin Nuvi 600 series to Factory default settings
| Hard Reset Garmin Nuvi 600 series to Factory default settings |
- Turn power Off and unplugged from power
- Touch and hold the lower right corner of the Lcd with an index finger or the eraser end of a pencil
- Continue touching and holding the lower right hand corner of the Lcd then power the device ON
- Release the power button when the device powers ON
- You will see a new message: “Do you really want to erase all user data?”
- Remove your finger from the touch Lcd when this message displays
- Touch Yes
If text language is not in English, this is the button on the right
The device will now reset. Follow the on-Lcd prompts and then place your device in an area with a clear view of the sky until it acquires satellites.
Tuesday, September 23, 2014
How To Easy Root Galaxy Tab 7 7 P6800 P6810 Running On Android 3 2 Honeycomb

- Download Framaroot and install it (open a file explorer, navigate your download and tap on it; you can also directly open the apk from browser download section to install it). If you see a warning box then you require to check Unknown sources under Settings –> Security.
- Open the app and then tap on install superuser or super SU of your choice.
- You will see some rooting options. Tap on any of the available rooting method and soon youll see the success message.